
How Proper Cable Drum Groove Design Extends Reeling Cable Service Life
Discover how drum groove design affects reeling cable performance on cranes and bulk handling gear. Learn groove dimensions, D/d ratios, fleet angle limits, common failure modes, and best practices to extend cable life and cut downtime.
hongjing.Wang@Feichun
6/18/202619 min read

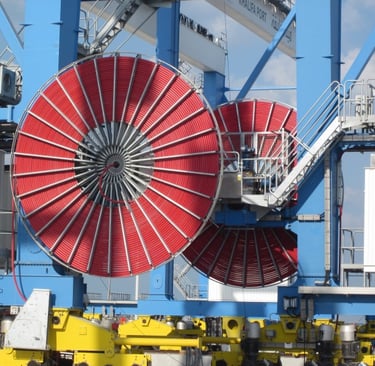
Introduction
If you run reeling cables on container cranes, stacker reclaimers, ship loaders, or mining equipment, you already know these cables cop a hammering. Constant winding, mechanical stress, salt-laden air at the wharf, abrasive dust in the pit — the operating environment is about as unforgiving as it gets.
When a reeling cable fails early, the natural instinct is to question the cable itself. Was the conductor class wrong? Was the jacket material up to scratch? Should we have specified a tougher construction? These are fair questions, and cable selection genuinely matters. But there's one factor that quietly determines cable life more than almost anything else, and it's the one most engineers walk straight past:
Drum groove design.
A poorly designed cable drum will chew through even a premium reeling cable. We're talking about real, repeatable failure modes: cable crossover, jacket abrasion, core breakage, crushing damage, excessive torsion, and the unplanned crane downtime that follows. When a single STS crane can move hundreds of containers an hour, an unexpected cable failure isn't just a maintenance headache — it's a serious hit to throughput and to the bottom line.
This article walks through the groove design parameters that actually matter, the recommended D/d ratios for different applications, the failure modes you'll see in the field, and practical guidance drawn from port and mining operations. Whether you're specifying a new system, troubleshooting a recurring failure, or simply trying to get more service life out of what you've already got, the goal here is to give you something you can use on the ground.
It's worth setting the scene a little, because the Australian context sharpens all of this. Our major container terminals — Port Botany, the Port of Melbourne, the Port of Brisbane, Fremantle — run their crane fleets hard, often around the clock, against demanding vessel schedules. Out in the Pilbara and across the coal chains of Queensland and the Hunter Valley, stacker reclaimers and shiploaders shift staggering tonnages of iron ore and coal, and the dust, heat, and remoteness of those sites mean a failed cable can take far longer to put right than it would in a city terminal. In both worlds, the cost of a cable failure isn't measured only in the price of the cable. It's measured in idle equipment, missed vessel windows, demurrage, and the knock-on disruption to a tightly scheduled supply chain. That's the backdrop against which getting the drum right earns its keep.
Why Drum Groove Design Matters
The drum is the foundation of any reeling system
It's worth being blunt about this: the drum is where the cable lives. Every single winding cycle puts the cable through a punishing sequence of loads, and the drum geometry shapes every one of them.
Each cycle generates:
Bending stress as the cable wraps around the drum
Sidewall pressure as it's guided into and held within the groove
Compression force from the weight and tension of the wraps above it
Torsional load as the cable twists during winding and unwinding
Here's the part that catches a lot of teams out: even the highest-quality reeling cable on the market will fail prematurely if the groove geometry is wrong. You can spend top dollar on an anti-torsion, oil-resistant, UV-stable cable with the best conductor class going, and still see it fail in months if the drum it's running on is poorly machined or incorrectly sized.
For high-value equipment, the stakes are higher still. Think about what's riding on the cable in each of these:
Ship-to-shore (STS) cranes
Rubber-tyred gantry (RTG) cranes
Rail-mounted gantry (RMG) cranes
Ship unloaders
Stacker reclaimers
In each case, drum design directly determines cable reliability — and cable reliability directly determines whether the machine keeps earning its keep. Getting the groove right at the design stage is dramatically cheaper than dealing with the consequences of getting it wrong.
The economics make the case on their own
It helps to frame this in dollars rather than physics, because that's the language that gets a specification signed off. A heavy-duty reeling cable for a large STS or RTG crane is not cheap — a long run of high-spec PUR reeling cable can represent a substantial line item on its own. But the cable itself is usually the smallest part of the total cost of a failure.
Consider what's actually on the meter when a reeling cable fails mid-shift:
The replacement cable, including freight to what may be a remote site
Labour to de-rig the failed cable and install the new one, often at premium or call-out rates
Crane downtime, which on a busy berth can run into thousands of dollars per hour in lost throughput
Schedule disruption — vessels that can't be worked on time, with demurrage and rebooking costs flowing downstream
Collateral damage if a failure damages adjacent equipment, the reel, or the drum itself
Set against all that, the marginal cost of specifying the drum properly — verifying the groove dimensions, confirming the D/d ratio, checking the fleet angle on the drawing — is almost nothing. It's engineering time spent up front to avoid operational losses later. This is why experienced asset managers treat the drum and the cable as a single capital decision rather than two separate purchases. The two are mechanically coupled for the entire service life of the system, and a saving on one that compromises the other is a false economy every time.
Key Drum Groove Parameters
Let's get into the numbers. There are five groove parameters that genuinely move the needle on cable life: groove radius, groove depth, groove pitch, groove width, and fleet angle. Get these right and you've solved most of the problem before the cable even goes on.
Groove Radius (R)
The groove radius determines how well the cable is cradled and supported as it winds. Think of it as the bed the cable sits in — too shallow a curve and the cable gets pinched; too generous and the cable rattles around with nowhere firm to sit.
Recommended values
Drawing on API 9B and Unirope recommendations, the working window is:
Minimum: 0.53 × cable diameter (d)
Maximum: 0.55 × cable diameter (d)
Optimum: 0.537 × cable diameter (d)
Worked example — 30 mm reeling cable
Minimum groove radius = 15.9 mm
Optimum groove radius = 16.11 mm
Maximum groove radius = 16.5 mm
That's a tight window — barely more than half a millimetre between minimum and maximum on a 30 mm cable. It tells you how precise the machining needs to be, and why "near enough" doesn't cut it here.
What happens when you get it wrong
If the radius is too small, the groove squeezes the cable:
Cable crushing
Jacket deformation
Conductor fatigue
If the radius is too large, the cable has too much freedom:
Poor cable guidance
Cable wandering across the drum face
Increased risk of crossover between wraps
Groove Depth
Where radius governs support, depth governs retention — how securely the cable is held in its lane rather than climbing out and riding over the wrap beside it.
Recommended values
Minimum depth = 0.35d
Preferred depth = 0.374d
Roughly 30% of the cable diameter as a rule of thumb
Worked example — 30 mm cable
Recommended groove depth: 10.5–11.2 mm
Too shallow and the cable lifts out under load, especially as the fleet angle changes across the drum. Too deep and you can run into clearance and winding issues. The preferred figure sits comfortably in the middle and is a sensible target for most reeling applications.
Groove Pitch
Pitch is the spacing between the centres of adjacent grooves — in other words, how far apart consecutive wraps sit on the drum.
Recommended values
Groove pitch = cable diameter + 2–4 mm
Worked example — 30 mm cable
Recommended pitch: 32–34 mm
That small clearance gap of 2–4 mm matters more than it looks. Pitch the grooves too tightly and adjacent wraps rub against each other, accelerating jacket wear. Pitch them too loosely and you waste drum length and invite the cable to wander. The 2–4 mm allowance gives each wrap enough breathing room without sacrificing control.
Groove Width
Groove width is closely related to radius and depth, and it's where manufacturing tolerance comes into play.
Recommended width
Cable diameter + half of the manufacturing tolerance
Getting the width right prevents a familiar trio of problems:
Excessive sidewall pressure
Cable jamming in the groove
Uneven winding across the drum
The "half tolerance" allowance accounts for real-world variation in cable diameter — no cable is dimensionally perfect along its entire length, and the groove needs to accommodate that without binding.
Fleet Angle
Fleet angle is the most important parameter on this list that people routinely ignore. It's the angle between the cable and a line drawn perpendicular to the drum axis, measured as the cable runs off to its guiding sheave or reel. As the cable winds across the drum face, that angle changes — and the larger it gets, the harder the cable is forced to drag sideways into its groove.
Recommended maximum
≤ 3.5°
Push beyond that limit and you load the cable up with every kind of stress you're trying to avoid:
Increased sidewall pressure
Accelerated jacket wear
Cable flattening
Torsional stress
Fleet angle is geometry you set with the position of the drum relative to the rest of the reeling system, so it's something to nail down at the design stage. Trying to fix an excessive fleet angle after commissioning usually means moving hardware around — expensive and disruptive. Far better to verify it on paper first.
Understanding the D/d Ratio
What is the D/d ratio?
If you take away one concept from this article, make it this one. The D/d ratio is the single most important number in reeling cable longevity.
D = drum diameter
d = cable diameter
The ratio between the two determines the bending stress the cable experiences every time it wraps around the drum. A small drum forces a tight bend, which means high stress concentrated in the conductors and insulation. A larger drum spreads that bend out over a gentler curve, dramatically reducing the strain on every wrap.
It's the same principle as bending a wire back and forth: a sharp, tight fold fatigues the metal far faster than a wide, gentle one. Multiply that by tens of thousands of winding cycles over a cable's life and you can see why the ratio matters so much.
It's worth understanding what's happening inside the cable as it bends, because it explains why this ratio is so unforgiving. When a cable wraps around a drum, the conductors and reinforcement on the outside of the bend are stretched while those on the inside are compressed. The tighter the bend — that is, the smaller the D/d ratio — the greater the difference between those two states, and the more the individual strands have to shift relative to one another to accommodate it. That relative movement, repeated cycle after cycle, is what works strands loose, abrades insulation from the inside, and eventually breaks conductors. A generous D/d ratio reduces both the magnitude of the strain and the amount of internal movement per cycle, and the benefit compounds over the life of the cable. This is also why bending radius and D/d ratio go hand in hand in manufacturers' datasheets — they're two ways of describing the same physical limit.
Recommended D/d Ratios by Application
There's no single magic number — the right ratio depends on what the cable is doing and how fast.
Standard low-voltage reeling applications
Minimum: D/d = 18
Recommended: D/d = 20
High-speed reeling systems (winding speeds above 180 m/min)
Minimum: D/d = 20–25
Recommended: D/d = 25
Higher speeds mean the cable cycles through its bends more often and with more dynamic load, so you give it a gentler curve to compensate. Skimping on the ratio here is a fast way to shorten cable life.
Boom hoist applications
Minimum: D/d = 15
Mining winding systems
Typical range: D/d = 70–90
That mining figure isn't a typo. Deep-shaft and heavy winding applications run enormous drums precisely because the consequences of cable failure are so severe and the loads so extreme. The huge ratio buys reliability and safety margin where it's needed most.
The practical takeaway: D/d ≥ 20 is the baseline for most port and bulk handling reeling applications, and you go up from there as speed and severity increase.
What the Cable Manufacturers Recommend
It's reassuring — and not coincidental — that the major reeling cable manufacturers converge on similar numbers. Their published specifications back up the design targets above.
Prysmian TROMMELFLEX
D/d ratio: 20
Winding speed: up to 180 m/min
Bending radius: 6 × D
Torsion capability: ±50°/m
Prysmian FESTOONFLEX / RONDOFLEX
D/d ratio: 20
Winding speed: up to 210 m/min
Bending radius: 6 × D
LAPP Trommelflex PUR-HF
D/d ratio: 20
Winding speed: up to 180 m/min
Bending radius: 6 × D
Notice the consistency: a D/d ratio of 20 and a 6 × D bending radius show up again and again. When independent manufacturers land on the same figures, that's a strong signal those numbers reflect real-world physics rather than marketing.
Feichun Heavy-Duty Reeling Cable Solutions
Feichun manufactures heavy-duty reeling cables built for exactly the demanding environments Australian operators deal with daily:
Container terminals
Bulk ports
Mining operations
Stacker reclaimers
Ship unloaders
RTG and STS cranes
Typical cable types include NSHTOEU, R-(N)TSCGEWOEU, N3GRDGOEU, and high-speed PUR reeling cables.
Key features worth highlighting:
Optimised for D/d ≥ 20
High tensile resistance
Anti-torsion construction
Excellent resistance to crushing pressure
UV- and oil-resistant jackets
Suited to harsh Australian port environments
That last point matters more than it might seem. A cable that performs beautifully in a temperate European yard can struggle with relentless UV, heat, and salt exposure on an Australian wharf. Specifying for the conditions you actually operate in — not the conditions on the datasheet from somewhere milder — is part of getting the whole system right.
Common Drum Groove Failures
Understanding the failure modes helps you read what your cables are telling you. When a reeling cable fails, the damage pattern usually points straight back to the root cause. Here are the four you'll meet most often.
1. Cable Crossover
Cause
Incorrect groove pitch
Low cable tension
Multi-layer winding issues
Consequences
Severe jacket abrasion where wraps rub
Crushing between cable layers
Accelerated conductor fatigue
Crossover is what happens when a wrap climbs out of its lane and rides over the one beside it. Once it starts, it tends to get worse with each cycle, and the abrasion at the crossover point can cut through a jacket surprisingly quickly.
2. Cable Crushing
Cause
Groove radius too small
Excessive winding pressure
Multi-layer compression
Consequences
Flattened cable profile
Insulation damage
Core breakage
Crushing shows up as a cable that's gone from round to oval. Once the geometry is deformed, the internal conductors and insulation are already compromised, even if the jacket still looks reasonable from the outside.
3. Sidewall Pressure Damage
Cause
Excessive fleet angle
Consequences
Jacket wear along one side
Sidewall abrasion
Permanent cable deformation
This is the failure mode that points back to fleet angle almost every time. If you're seeing wear concentrated on one side of the cable, check your fleet angle before you blame the cable.
4. Copper Conductor Fatigue
Cause
Excessive compression
Poor groove design
Repeated bending stress
Consequences
Broken conductor strands
Increased electrical resistance
Unexpected downtime
Conductor fatigue is the insidious one, because it often hides inside an apparently intact cable. Broken strands raise resistance and generate heat, and the first obvious symptom can be an outright electrical failure with no warning. A correct D/d ratio is your best defence here.
Real-World Failure Cases
Theory is useful, but failures in the field are where the lessons really land. A few documented cases illustrate how groove issues play out.
NASA Guppy winch rope failure
A failure analysis on a winch rope traced the problem to two causes: groove geometry that was too tight, and insufficient lubrication. The result was localised crushing and progressive rope failure. Critically, the worst damage was observed at the first exit drum groove, where peening and slack accumulation occurred — a reminder that the exit point of the drum is often where the highest stresses concentrate.
Heavy Equipment Forums case studies
Operator forums are a goldmine of real-world experience, and several threads underline the points above.
Case 1 — Wire rope damage. A crane owner reported severe wire rope damage just three days after a replacement, and was left wondering whether installation error or a manufacturing defect was to blame. (heavyequipmentforums.com/threads/wire-rope-damage.97163/) The short timeframe is the tell here — failures that fast almost always point to a setup or geometry problem rather than the cable itself wearing out.
Case 2 — Removing the drum rope wedge. A discussion centred on the practical difficulty of removing the rope wedge from a crane drum, highlighting how installation challenges affect the whole system. (heavyequipmentforums.com/threads/need-help-removing-the-drum-rope-wedge.71981/)
Case 3 — Wire rope wedge for P&H. This thread explored how incorrect wedge sizing affects cable seating and drum performance. (heavyequipmentforums.com/threads/wire-rope-wedge-for-p-h.83655/) Seating problems ripple through to winding behaviour and, eventually, to cable life.
Case 4 — Old conventionals at work. Operators discussed how improperly machined drum grooves degrade cable spooling performance. (heavyequipmentforums.com/threads/old-conventionals-at-work.71071/) It's a recurring theme: machining quality on the groove is not a detail you can afford to overlook.
The common thread across all of these is that the drum, not just the cable, deserves scrutiny when something fails early.
Reading the Damage: A Practical Diagnostic Guide
When a cable comes off early, the failed cable is the best piece of evidence you'll get. Before you order a replacement and move on, take ten minutes to read what the damage is telling you — because if you don't find the root cause, the new cable will fail the same way. Here's a practical way to work through it.
Where on the cable is the damage concentrated?
Damage that's localised to one section, repeating at a regular interval, usually points to the drum. If the worst wear appears at the same wrap position every time, the geometry at that point on the drum is the likely culprit — a particular groove that's out of tolerance, a transition point between layers, or the exit groove where stresses peak. Damage spread evenly along the whole length is more likely a general issue: an undersized D/d ratio, a cable that's simply at the end of its life, or a systemic tension problem.
What does the cross-section look like?
A cable that's gone oval or flat has been crushed — look at groove radius, winding tension, and multi-layer compression. A cable that's still round but has jacket wear concentrated on one side has almost certainly been dragged sideways, which sends you straight to fleet angle. A cable with a clean round profile but broken internal conductors points to bending fatigue, and therefore to the D/d ratio.
What does the jacket surface tell you?
Polished, shiny abrasion across the high points of the jacket suggests rubbing against an adjacent wrap — a crossover or pitch problem. Scoring and gouging along one flank suggests sidewall pressure from excessive fleet angle. A jacket that's gone brittle, cracked, or chalky, on the other hand, may be an environmental or material issue rather than a geometric one — relevant in Australia's high-UV, high-heat conditions, and a reminder to check that the jacket compound is rated for the site.
Is there a pattern in the timing?
A cable that fails within days of installation, as in the forum case above, is almost never a worn-out cable — it's a setup problem. Check installation, seating, tension, and groove condition before anything else. A cable that fails after a long but disappointing service life is more likely telling you the D/d ratio or duty cycle is marginal for the application.
Working through these questions turns a frustrating failure into useful data. Keep a simple log of failures — position, cross-section, surface condition, time in service — and over a few cycles the pattern usually makes the root cause obvious. That log is one of the cheapest reliability tools available, and far too few operations keep one.
Inspection and Maintenance: Keeping a Good Design Good
A correctly designed drum will give you long cable life, but only if it stays in good condition and the cable is run within its limits. Drums wear, grooves degrade, tension drifts, and small problems compound. A modest, regular inspection routine protects the investment you made at the design stage.
Inspect the drum grooves, not just the cable. It's easy to focus inspections entirely on the cable and forget that the groove it runs in is wearing too. Over time, grooves can develop ridges, peening at the edges, corrosion, or wear that opens the radius or roughens the surface. A groove that has worn out of tolerance will start damaging cables no matter how good the cable is. Periodically check the groove profile against the original specification, and pay particular attention to the exit groove, where the NASA case reminds us stresses concentrate.
Watch the winding pattern in service. A drum that's spooling cleanly lays each wrap neatly beside the last. If you start seeing gaps, climbing, or crossover developing during normal operation, that's an early warning — usually of a tension or pitch issue — and it's far cheaper to correct before it damages the cable than after.
Check and maintain tension settings. Correct winding tension keeps the cable seated in its groove and prevents the slack accumulation that leads to crossover and crushing. Tension systems can drift over time, so they deserve periodic verification rather than a set-and-forget approach.
Confirm the fleet angle hasn't changed. On long-travel reel systems especially, structural movement, wear in guide rollers, or shifts in alignment can quietly push the fleet angle past its limit. If sidewall wear starts appearing where it didn't before, re-check the geometry.
Keep records. Log cable installations, failures, inspection findings, and service hours. Trends in that data are what let you move from reactive replacement to genuine predictive maintenance — replacing cables on your schedule, during planned downtime, rather than on the cable's schedule, in the middle of a shift.
None of this is complicated or expensive, and in a busy port or mine it's easy to let it slide. But the operations that get the longest life from their reeling cables are almost always the ones that treat the drum-and-cable system as something to be maintained, not just installed and forgotten.
Port Crane Drum Design Examples
To anchor the numbers in real equipment, here's how the parameters translate into actual crane drum dimensions.
STS cranes
Drum diameter: 700–1000 mm
Cable diameter: 31–38 mm
D/d ratio: 18.4–32.3
RTG cranes
Drum diameter: 600–900 mm
Cable diameter: 27–35 mm
D/d ratio: 17.1–33.3
Notice that the bottom of these ranges dips close to — or even slightly below — the D/d = 18–20 target. That's exactly where you need to be careful. A drum at the low end of these ranges leaves no margin, so cable selection, fleet angle control, and winding tension all have to be spot-on to compensate.
Cavotec STS crane project
A standout example of extreme-duty design: a project featuring six record-breaking STS cranes with drum diameters up to 6.4 m and a lifting height of 73.5 m. At that scale, proper drum sizing isn't a nicety — it's the only thing that makes the system viable at all. The enormous drum diameters keep bending stress manageable even on very large cables.
Konecranes RTG and STS systems
Long-travel cable reel systems present their own challenge. Typical configurations run cable lengths between 300 and 700 m, with drum reels mounted on middle-beam structures. Over those distances, precise groove geometry becomes essential to avoid crossover and sidewall pressure problems — small geometric errors compound across hundreds of metres of travel.
Why Parallel Grooving Is Preferred
Not all drums are grooved the same way, and the choice has real consequences. Compared with smooth or helical drums, parallel-grooved drums offer clear advantages:
More consistent cable layering
Reduced crushing pressure
Better load distribution across the drum
Lower maintenance costs over the life of the system
How much difference does it make? In certain multi-layer winding applications, studies have reported service life improvements exceeding 500%. That's not a marginal gain — it's the difference between replacing a cable several times a year and replacing it once. For any operation running multi-layer winding, parallel grooving should be the default starting point, not an upgrade you consider later.
Matching the Cable to the Drum — and the Site
Drum design and cable selection are two halves of the same decision, and the best results come from specifying them together rather than in sequence. A few principles tie the cable choice back to everything above.
Start with the D/d ratio and work outward. Once you know your drum diameter and your application's speed and duty, the minimum acceptable cable diameter — and therefore the cable's bend tolerance — falls out of the D/d requirement. A cable rated for D/d ≥ 20 with a 6 × D bending radius, like the major manufacturers' reeling ranges, gives you a sound baseline for standard port work. Step up the rating as winding speed climbs past 180 m/min.
Insist on anti-torsion construction for reeling duty. Reeling cables twist as they wind and unwind, and a cable that isn't built to handle that torsion will eventually corkscrew, kink, and fail regardless of how good the drum is. Torsion capability — Prysmian's TROMMELFLEX, for instance, quotes ±50°/m — is a real specification worth checking, not a marketing footnote.
Specify the jacket for the environment, not the catalogue. This is where Australian conditions genuinely change the answer. A jacket needs to handle relentless UV, high ambient heat, and — at the coast — salt and moisture; at mine sites, it also has to resist oil, abrasive dust, and mechanical knocks. PUR (polyurethane) jackets are popular for heavy reeling duty precisely because they stand up well to abrasion, oil, and weathering. Confirm the jacket compound is rated for your worst-case site conditions, because a cable optimised for a mild climate will age prematurely under an Australian sun.
Don't forget crush resistance. In multi-layer winding, the lower wraps carry the weight of everything above them. A cable with strong resistance to crushing pressure — built into the core construction and reinforcement — holds its shape and protects the conductors where a softer cable would deform. This matters most on deep drums with many layers.
The point of all this is that the cable and the drum have to be designed as a matched pair. Feichun's heavy-duty reeling range, for example, is built around D/d ≥ 20 with anti-torsion construction, strong crush resistance, and UV- and oil-resistant jackets precisely so it can be paired with a properly specified drum to deliver full service life in tough environments. Whatever brand you choose, the discipline is the same: match the cable's bend tolerance, torsion capability, crush resistance, and jacket to both the drum geometry and the site.
Best Practices for Heavy-Duty Reeling Cable Systems
Before you sign off on a cable drum specification, run through this checklist. Every item ties back to something covered above, and together they cover the vast majority of preventable failures.
✔ Groove radius = 0.53–0.55d
✔ Groove depth ≥ 0.35d
✔ Groove pitch = cable diameter + 2–4 mm
✔ Fleet angle ≤ 3.5°
✔ D/d ratio ≥ 20
✔ Parallel grooving for multi-layer winding
✔ Anti-torsion cable construction
✔ Correct installation and tension settings
If you can tick all eight with confidence, you've eliminated most of the design-stage causes of premature cable failure. The two that get overlooked most often are fleet angle and tension settings — both are easy to verify before commissioning and painful to fix afterwards, so give them extra attention.
Frequently Asked Questions
What's the single most important number to get right?
If you only check one thing, check the D/d ratio. For most port and bulk handling reeling applications, keep it at 20 or above, and go higher for high-speed systems. It governs the bending stress the cable experiences on every wrap, and an undersized ratio shortens cable life faster than almost any other single factor.
My cable failed just days after installation. Is it a faulty cable?
Probably not. A cable that fails that quickly is almost always pointing to a setup or geometry problem rather than a defective cable — check installation, seating, winding tension, and the condition of the drum grooves before you assume a manufacturing fault. Genuine cable wear-out takes far longer to show up.
How do I know if my fleet angle is too large?
The clearest in-service sign is jacket wear concentrated along one side of the cable, caused by it being dragged sideways into the groove. Keep the fleet angle at or below 3.5°. Because it's set by the geometry of where the drum sits relative to the rest of the system, it's best verified on the drawing and confirmed at commissioning rather than fixed later.
Is parallel grooving really worth the extra cost?
For multi-layer winding, almost always. The reported service-life improvements — exceeding 500% in some applications — comfortably outweigh the upfront difference, and you also get more consistent layering and lower maintenance costs. For single-layer systems the case is less dramatic, but parallel grooving remains the safer default.
Does the Australian climate actually change my cable choice?
Yes. High UV, heat, salt at coastal ports, and oil and abrasive dust at mine sites all stress the jacket. Specify a jacket compound — PUR is a common choice for heavy reeling duty — rated for your worst-case site conditions rather than relying on a generic catalogue rating intended for milder climates.
How often should I inspect the drum itself?
Inspect the grooves, not just the cable, on a regular schedule — looking for wear, peening, ridges, and corrosion, with particular attention to the exit groove. A drum that has worn out of tolerance will damage new cables no matter how good they are, so the drum's condition is part of every cable's life expectancy.
Conclusion
The performance of a heavy-duty reeling cable depends on far more than cable construction alone. The quality of the drum groove design is every bit as important — and arguably more so, because no cable, however well made, can outlast a drum that's working against it.
Get the fundamentals right — proper groove geometry, an adequate D/d ratio, a controlled fleet angle, and a cable matched to the application — and you can dramatically cut cable failures while lifting operational reliability. For the demanding work that defines Australian ports and mines — STS cranes, RTGs, stacker reclaimers, ship unloaders, and mining winding systems — combining optimised drum design with a high-performance reeling cable such as Feichun's heavy-duty range gives you a genuinely reliable solution. The payoff is longer cable service life, fewer surprises, and far less unplanned downtime where it hurts most.
The drum and the cable are a system. Treat them as one, design both with the numbers above in mind, and your reeling cables will reward you with the kind of service life that makes the whole operation run smoother.
How to Reach Us
Get in Touch
SiteMap
Product Catalogue
Festoon Cable
Shore Power Cable




Scan to add us on WeChat